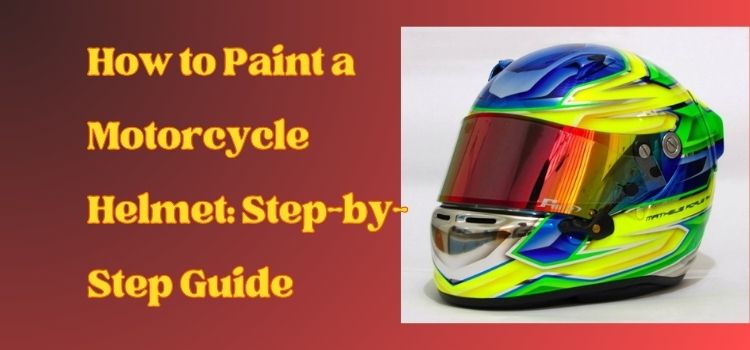
How to Paint a Motorcycle Helmet: Step-by-Step Guide
Learn how to paint a motorcycle helmet in 2023 and get ready to turn heads and break necks as you ride by with a personalized helmet that screams, “I did it for me!”
Motorcycle helmets are an essential safety accessory, but they can be bland and generic-looking. If you want to customize your helmet and make it stand out, you might need help figuring out where to start.
Painting your motorcycle helmet is the best way to add a personal touch to your motorcycle gear.
In this guide, we’ll walk you through the process of painting your motorcycle helmet, from preparing the surface to applying the paint and clear coat. By following these steps, you’ll be able to create a unique and eye-catching design that reflects your style and personality.
How to Paint a Motorcycle Helmet: Step-by-Step Guide
Painting a motorbike helmet is a fun way to make your gear look unique and reflect your personality. But you need to make sure you follow the right steps to make sure the paint sticks well and the helmet stays safe to use. Here are the steps for painting a motorbike helmet:
Materials needed:
- Sandpaper
- Acrylic Paint
- Paintbrush
- Plastic cleaner
- Masking tape
- Primer
- Spray paint
- Clear coat
Step 1: Preparation
Remove any stickers, visors, or attachments from the helmet. Clean the helmet thoroughly with soap and water, and let it dry completely. Use a plastic cleaner to remove any oils or residue that may be on the helmet.
Here are the steps you can follow to clean your helmet:
- Take off any stickers, visors, or other things that are attached to the helmet.
- Use a soft cloth or sponge and soap and water to clean the helmet well. Don’t use rough materials that could scratch the surface of the helmet.
- Rinse the helmet with clean water to get rid of all the soap.
- Don’t move on to the next step until the helmet is completely dry.
- Use a plastic cleaner made for helmets to get rid of any oils or other stuff that might be on the helmet. Follow the directions that the maker of the plastic cleaner gives you.
- Check the helmet for signs of damage or wear after you’ve cleaned it. If the helmet has cracks, dents, or other damage, it might be time to get a new one.

It’s important to keep your helmet clean and in good condition to ensure it provides maximum protection in case of an accident.
Step 2: Sanding
Use sandpaper to roughen the surface of the helmet. This will help the paint adhere better. Use fine-grit sandpaper (around 320-grit) to avoid damaging the helmet’s shell.
If you want to paint a helmet, it’s essential to prepare the surface properly before painting to ensure that the paint adheres correctly and lasts as long as possible. Here are the steps to follow to roughen the surface of a helmet using sandpaper:
- Choose the right sandpaper. To make the helmet’s surface rougher, use 320-grit fine-grit sandpaper. If you use a lower grit, you could end up with deep cuts, and if you use a higher grit, the surface might not be rough enough for the paint to stick.
- Begin sanding: Use small, rolling motions to rub the sandpaper over the surface of the helmet. To avoid making dents or divots, be careful not to sand too hard or too long in any one spot. The goal is to make the surface rough so that the paint will stick to it.
- Check how you’re doing: After polishing for a few minutes, wipe the surface clean of any dust or other debris that may have gathered. Check to see if enough roughness has been added to the surface. If it still feels too smooth, you may need to sand it a little more.
- Finish: Once you’re happy with how rough the surface is, wipe the helmet clean again and let it dry completely before painting.
By following these steps, you can ensure that the surface of the helmet is properly prepared for painting and that the paint will adhere well and look great.
Step 3: Masking
Masking tape is an essential step when painting a helmet to ensure that the paint only covers the intended surfaces and does not damage or interfere with other parts of the helmet. Gather high-quality masking tape that can withstand the type of paint you plan to use.
Plan which areas to cover and press it down firmly to create a seal between the tape and the helmet. When finished painting, remove the tape carefully and touch up any areas that were accidentally painted over or under the tape.
Step 4: Primer
Primer is a crucial step in preparing a surface for painting, as it helps to create a smooth and even surface for the paint to adhere to and enhances the durability and longevity of the paint job.
When applying primer to a plastic surface like a helmet, it is important to use a primer that is specifically formulated for plastic. After applying the primer, it is essential to wait for it to dry completely before proceeding to the next step.
A good rule of thumb is to wait at least 24 hours before painting over the primer, but refer to the manufacturer’s instructions for more specific drying times.
Step 5: Paint
Hold the spray paint can about 10 to 12 inches away from the helmet and use a rolling motion to cover the whole surface evenly with the paint.
It’s important to use several thin coats instead of one thick one because this will make the finish smoother and more even. Let each coat dry completely before adding the next one. This could take anywhere from 30 minutes to an hour, based on the paint and the weather.
For even covering, make sure to overlap the previous coat a little bit when you apply the next one. Keep in mind that it’s better to apply several thin coats than to try to cover the whole area with one or two thick coats, which can lead to drips and an uneven finish.
Wait until the paint is completely dry before you touch or use the helmet after the last coat. This could take a few hours, so be patient and don’t touch the surface until the paint is completely dry.
Step 6: Clear coat
When the paint is dry, put a clear coat over it to cover it and make it look shiny. Apply several thin coats of clear coat, waiting for each one to dry before adding the next.
This will keep the clear coat from getting bubbles or dripping. It’s important to use a good quality clear coat that goes well with the paint you used. Before you put on the clear coat, make sure to read the directions carefully and wear gloves and a mask so you don’t breathe in any fumes.
Don’t touch the object until the clear coat is completely dry, and don’t subject it to harsh chemicals or rough materials that could scratch the surface. If you use the clear coat correctly and take care of it, it will help your paint job look great for years to come.
Step 7: Final touches
Once the clear coat is dry, remove the masking tape and any other coverings. Reattach any visors or attachments that you removed earlier.
It is important to note that painting a motorcycle helmet can affect its safety performance. Be sure to follow the helmet manufacturer’s instructions and consult a professional if you are unsure about any aspect of the process. How long does it take to paint a helmet for a motorcycle?
How to paint a motorcycle helmet and the time it needs depend on a number of things, such as the size of the helmet, how complicated the design is, and how long each layer of paint needs to dry. On average, the process can be done in anywhere from a few hours to a few days.
2 Methods of Painting a Motorcycle Helmet
There are two major methods for painting a motorcycle helmet, which are given below:
Painting a Motorcycle Helmet using Acrylic Paint and Brush:
- Requires hand-painting with brushes and fine detail work.
- Offers precise control over colors and design.
- Allows for intricate designs and patterns.
- Requires multiple coats and drying time.
- Suitable for customizing helmets with unique artwork.
Painting Helmet using Spray Paint:
- Involves spraying paint evenly over the helmet’s surface.
- Provides a smooth and uniform finish.
- Faster application compared to hand-painting.
- May require masking and protective measures for specific designs.
- Ideal for solid colors and simple gradients.
Cost of painting a motorcycle helmet
If you want to paint the helmet yourself, you will need to buy things like sandpaper, base, paint, and a clear coat. The cost of these things can vary, but you should plan to pay between $20 and $50 for everything you need. Keep in mind that the cost will go up if you choose to use better products, like automotive paint.
If you want to pay someone else to paint your helmet, the price will depend on how complicated the design is and how much detail you want. Some experienced painters charge by the hour, while others charge a flat rate for the whole job. A unique paint job from a professional will cost between $100 and $200 on average.
It’s important to remember that the price of painting a motorcycle helmet depends on where you live and whether or not there are skilled painters in your area. Also, if you choose to have your helmet painted especially for you, you may have to pay extra for design discussions or mock-ups.
Overall, the price of painting a motorcycle helmet can be very different based on what you want and what you need. Do some study and get quotes from both do-it-yourself suppliers and professional painters to figure out which is best for you.
DIY or pro for painting motorcycle helmets?
You can paint your own motorbike helmet, but it can be hard and take a long time. If you aren’t sure about your painting skills or want a more complicated pattern, you might want to hire a professional.
Painting a motorcycle helmet is a fun and rewarding job that lets you personalize your bike and show off your style.
By following the steps in this piece, you can make a unique design that shows off your personality and makes you stand out on the road.
Factors to Consider
Here are some more points which are very important for you to know.
Purpose
Determine the purpose of the paint. Is it for interior or exterior use? Will it be used for walls, ceilings, or trim? Understanding the purpose of the paint will help you choose the right type.
Quality
Look for high-quality paints that offer good coverage and durability. Cheaper paints may seem like a bargain, but they often require more coats and don’t last as long, which can end up costing you more in the long run.
Color
Choose a color that you love, but also consider how it will look in different lighting and how it will complement other colors in the room.
VOCs
Check the label for volatile organic compounds (VOCs), which are chemicals that can contribute to indoor air pollution. Choose paints with low or zero VOCs to minimize your exposure to harmful chemicals.
Brand
Stick with reputable brands that have a proven track record of quality and customer satisfaction. Do your research and read reviews before making a purchase.
By taking these factors into consideration, you can ensure that you choose the right paint for your needs and get the results you want.
Advanced option to paint a motorcycle helmet
You can personalize your gear and make a statement while you ride by painting your motorbike helmet. When it comes to painting a helmet, you can take your design to the next level by using a few advanced techniques. You could use an airbrush to make drawings or patterns with a lot of detail.
This technique takes practice and a steady hand, but the effects can be beautiful. You could also use several layers of paint to give your image depth and texture.
You can do this by putting colors on top of each other, using stencils or masks, and adding features with a small brush. No matter what method you use, it’s important to use good paint and take the right safety measures to make sure the finish will last.
The Easiest Way to Paint a motorcycle helmet
Painting your motorbike helmet is a fun and creative way to make it your own and stand out. The best way to paint a motorcycle helmet is to clean it well with soap and water and then lightly sand it to make sure the paint sticks well.
Next, put a base coat of primer on the surface and let it dry fully.
Last, use spray paint to add the colour or pattern you want, following the manufacturer’s instructions, and let it dry completely before putting it back on.
Wear the right safety gear, work in a well-ventilated area, and take your time to make sure the finish is smooth and even.
Conclusion
In the end, you need to pay close attention to detail, be patient, and use the right tools to paint a motorbike helmet. Whether you hire a professional or do the job yourself, you should put safety first and take all the necessary measures.
By doing this, you can make your helmet fit your style while still making sure it keeps its protective qualities.
So, whether you want to give an old helmet a new look or make a completely new one, these tips and rules will help you get what you want. Happy drawing!
FAQs
Q. Is it Easy to Paint A Helmet?
Ans. There are a few tips to follow and then you are all set to paint the helmet. Yes, it is quite easy to paint a helmet.
Q. Is it Legal To Paint the Helmet?
Ans. Most countries have banned helmet painting and they have added it to illegal actions because the durability of helmets becomes less. But there are many countries that allow helmet paint under some circumstances. Ask the traffic headquarters before painting a helmet.
Q. Is it Okay and Safe to paint bike helmets?
Ans. It is the most commonly asked question by many bike riders. Well, if you are carefully painting it and the helmet remains safe, then it is totally okay to paint bike helmets. But if you do not take care of precautionary measures and safe painting tips, then it is unsafe. The reason is that you can damage the helmet and its parts.
Q. What are suitable paints for my helmet?
Ans. You can go for watercolors or acrylic paints. Always make sure to check the texture and composition of the paints before buying them. You must also make sure to tell the paint seller that you are buying the paint for the purpose of painting a helmet.